Using Conda with VSCode and Jupyter Notebooks
Setup for both methods
Create a Conda Environment
We will again be utilizing YML files to define our conda environments. In addition to the packages we need for our analysis, we will also need to install the ipykernel package to enable our jupyter notebook to access the conda environment.
An example YML file may look something like:
name: notebook_env
channels:
  - conda-forge
  - bioconda
dependencies:
  - ipykernel
  - numpy
  - pandas
  - matplotlib
  - seaborn
  - scanpy
You will then need to manually create the conda environment. Assuming you had
saved the file as notebook_env.yml, you can create the environment by running:
conda env create -f notebook_env.yml
Method 1 Overview - Jupyter & VSCode & Conda
It can be helpful to work directly in VSCode and Jupyter Notebooks when developing your pipelines. This will enable you to take advantage of both the features of VSCode and Jupyter Notebooks to make your development process more efficient.
Just like for our nextflow processes, we will want to carefully define a conda environment for the analysis we will be performing in our jupyter notebooks. These analyses being done in your notebook can often be some of the most biologically relevant and interesting results. It is critically important that these analyses are reproducible and transparent.
VSCode Requirements
You will need to install the following extensions for VSCode:
- Python
- Jupyter Notebook
You can install these extensions by opening the extensions view in VSCode (View > Extensions) and searching for the extensions listed above.
VSCode
Before you open VSCode, make sure that you load the miniconda module under
the “Additional moduels to load” tab in the SCC OnDemand interface.
If you open up VSCode, you can make a jupyter notebook. All this entails is
making a new file and saving it with a .ipynb extension. The jupyter extension
will automatically recognize this as a jupyter notebook and enable all of the
standard jupyter notebook features.

If you open this notebook and look in the top right corner, you should see the
Select Kernel option. Please select this and then select Python Environments....
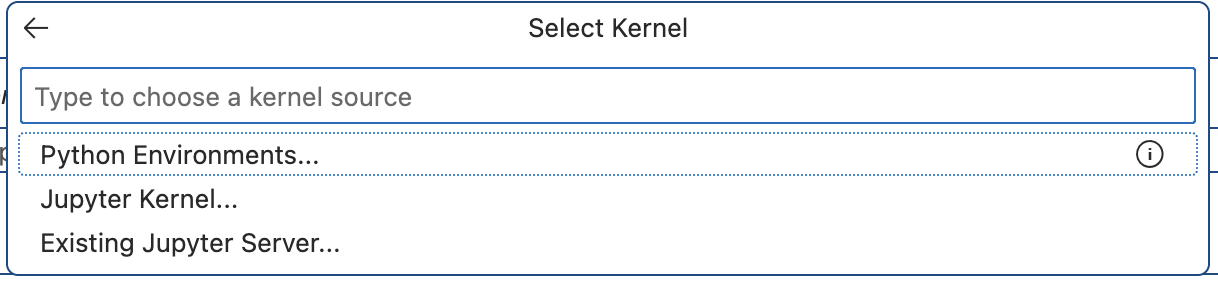
From the dropdown menu, find the name of the conda environment you created, in
our example it would be notebook_env, and select it. This will enable you to
run your jupyter notebook using the conda environment you created.
Method 2 Overview - JupyterLab & Conda
BU SCC OnDemand also supports the use of JupyterLab, which is a feature-rich interface that provides a more modern and user-friendly experience for working with Jupyter Notebooks.
Navigate to OnDemand
Under Interactive Apps, please select Jupyter Notebook to launch a jupyter
notebook server on a compute node.
Please ensure that you do the following (you may refer to the image for reference as well):
-
Load the miniconda module under
List of modules to load -
Use the command listed below for your
Pre-Launch Command
conda activate notebook_env
- Select the
labinterface underInterface
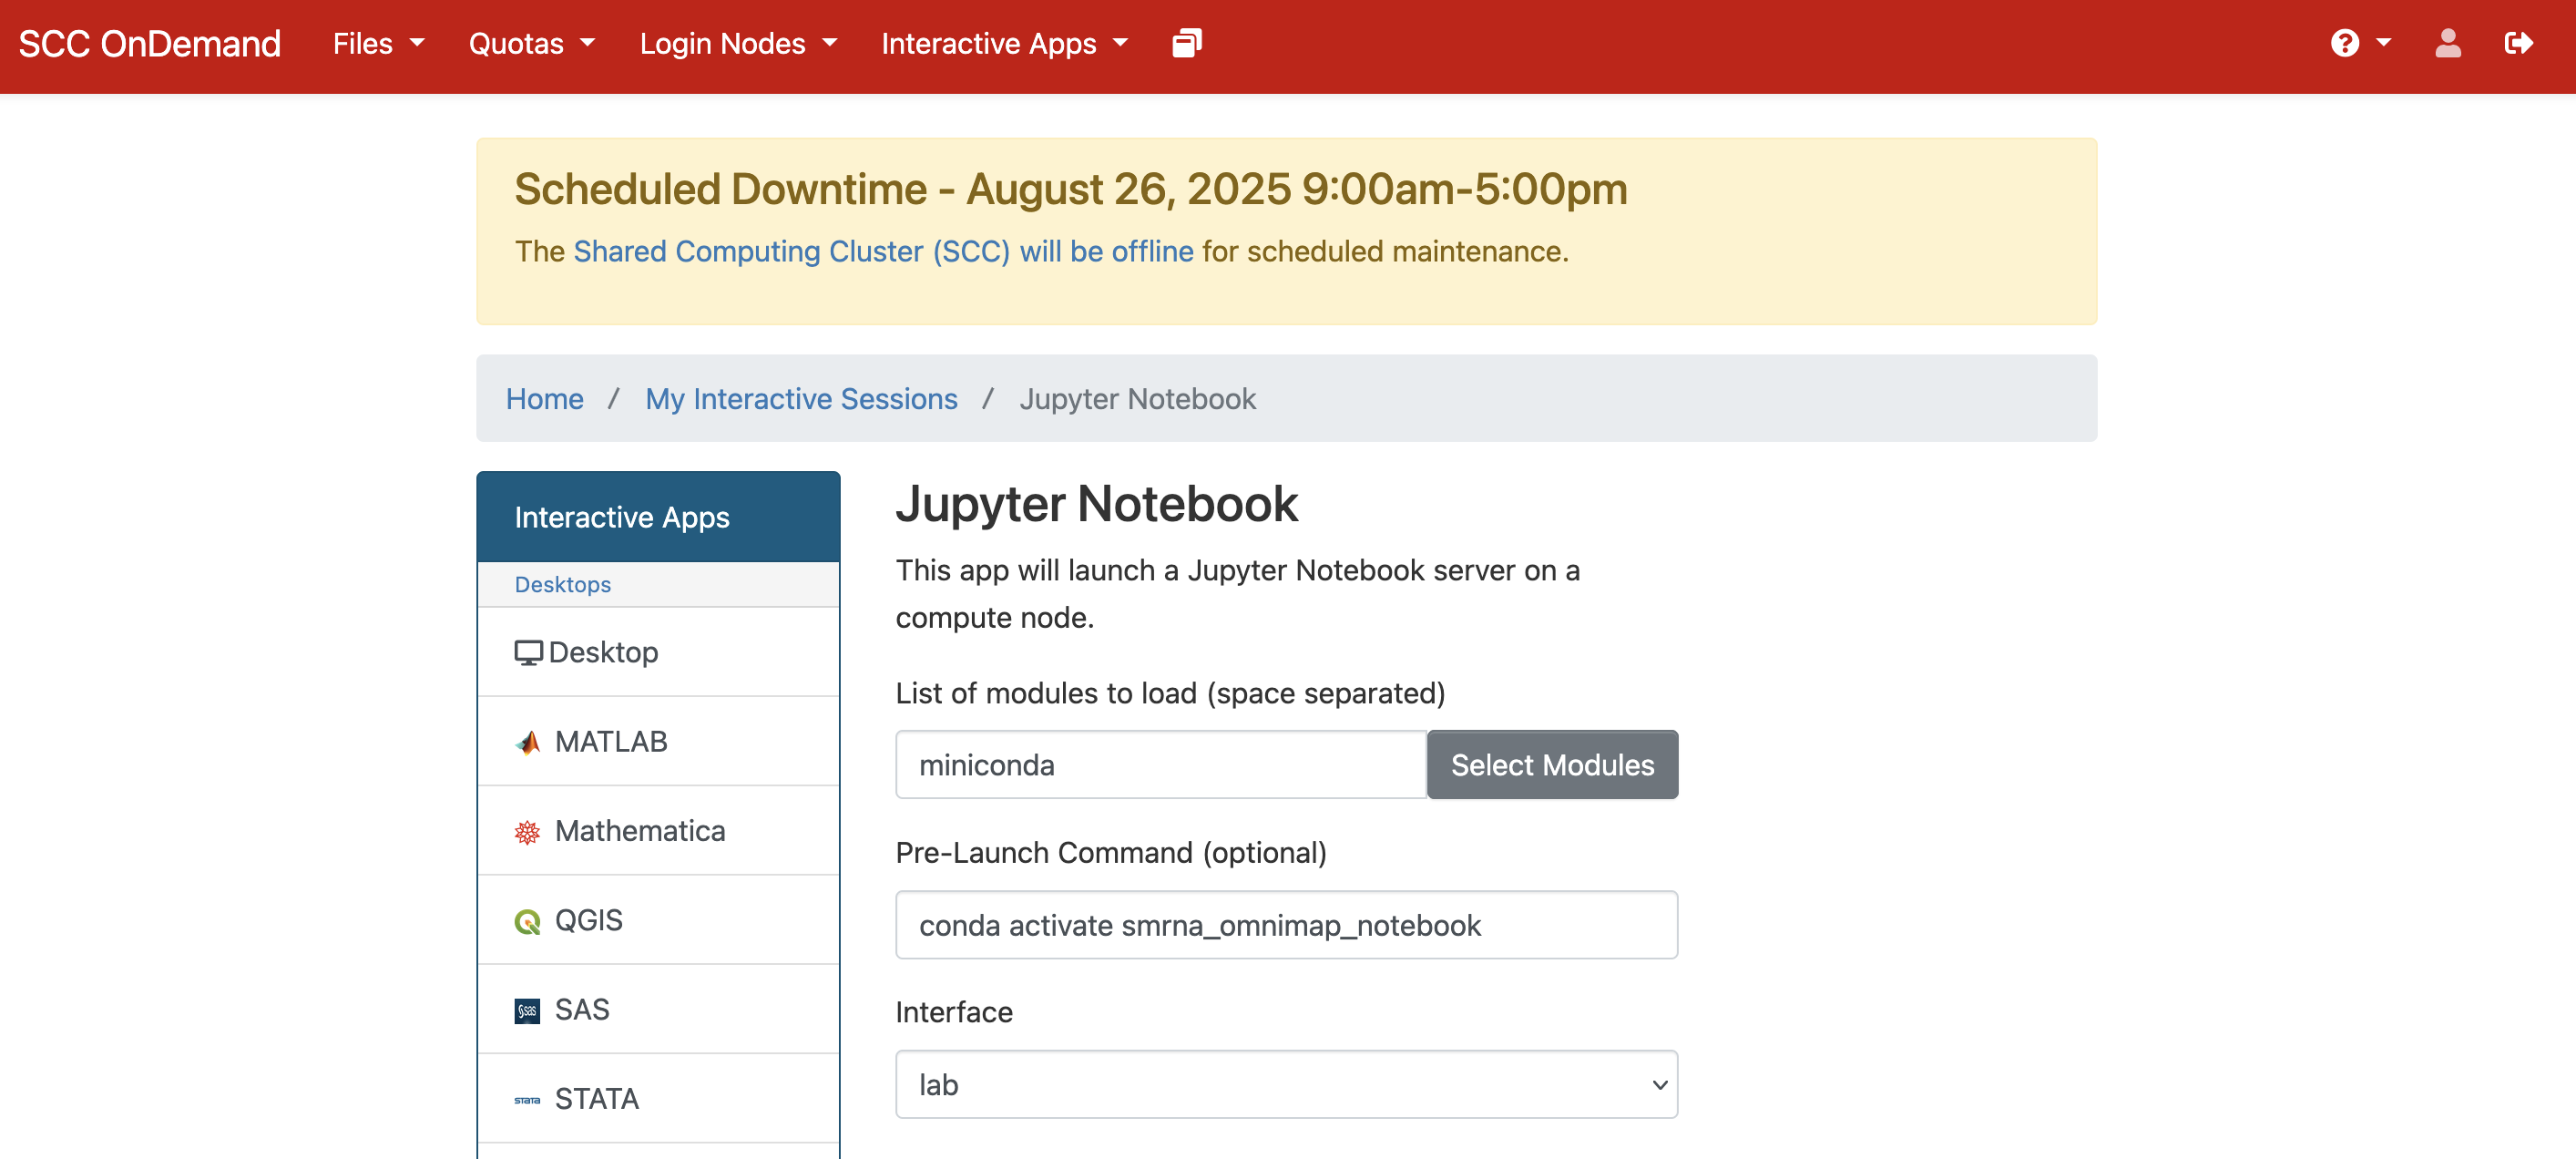
This will create a JupyterLab session with your conda environment activated. You can then use the built-in jupyter notebook interface to create and run your notebooks and access and use the packages installed in your conda environment.